Sock dolls were popular around the 1900's. The Nelson Knitting Mills
in Rockford Illinois first made the original rockford red heeled sock in 1890.
In 1920 the mill soon began packaging the directions for the sock monkeys with
each pair of socks after a customer
fashioned a doll and sent it to the company. The Nelson Knitting Mills was purchased by
Fox River Mills
in the 1992 and now Fox River makes the Red Heel Monkey Sock.
bibliography:
America's stuffed toy: the sock monkey Fox River
[http://www.foxrivermills.com/foxriver/SilverStream/Pages/
pgMonkeys.html]
02/19/2001
Socking the Monkey People Weekly 5/8/1995 v43 n18 p225(1) Time Inc.
When you purchase a pair of Red Heel Monkey Socks, it comes with instructions
to make a Sock Monkey.
The following instructions are NOT the same instructions that come with the sock.
These instructions are much more detailed.
Tools:
scissors ruler pen needle pins and sewing machine (optional)
Stuff used:
Pair of Red Heel Monkey Socks
off white thread
polyester fiberfill stuffing
black embroidery thread
Optional:
2 1/2" googly eyes
10" piece of red yarn or ribbon
Instructions:
The head, body and legs:
Turn the sock inside out.
Lay the sock so the heel is facing toward you. The toes are the
top of the sock, and the opening is the bottom of the sock (see picture).
Use a ruler to find the center of the sock and, with a pen, mark the center line
of the sock from 1 1/2" below the white heel to the bottom opening.
Starting 3" below the white heal, sew a seam 1/2" away from the center line,
down toward the bottom opening, to form a leg. Curve the seam down at the bottom
opening to form rounded feet.
Repeat previous step on opposite side of center line to form other leg.
Cut along the center line until 1 1/2" below the white heal. This
should leave a hole in the "crotch" of the monkey for turning.
Turn sock right side out.
Through the "crotch" hole fill firmly with stuffing.
Whip stitch "crotch" close with off white thread.
The hat tail, mouth, arms, ears, and eyes:
Cutting the pieces:
Fold the sock flat in a side profile position (see picture).
For the hat, cut out the white toe area of the sock, leaving about 3/4" area of brown
around the cut out.
For the tail, measure 1" in from the top fold and mark line with pen.
Cut along the mark to form one long, 2" wide rectangle.
For the mouth, cut out the white and red heal area, leaving a 1/2" area of brown
around the cut out, to turn under.
For the arms, cut the remaining area above the heel into two rectangular pieces.
For the ears, use the remaining piece of sock below the heel. With the sock doubled,
cut out 2 identical half circles - because the sock is double you should end up with 4
pieces.
Preparing and attaching the pieces:
For the tail, fold the rectangle in half the long way, with right sides together.
From the brown end stitch a 1/4" seam down the long side of the rectangle,
curving the seam at the bottom to form a rounded tail end. Turn right side out, then
fill firmly with stuffing. The tail should be positioned in the center of the red heel
or "butt" on the body of the monkey. Turn under 1/4" around the opening and whip stitch
tail to monkey body.
For the mouth, turn under brown edges. At the head of the monkey on the body,
there is
a distinct division between the white toe area, and the brown below. The mouth should
be positioned so that the top white part of the mouth, above the red lips, are above
in the white area of the head, and the bottom white part of the mouth, below the red lips
are in the brown area. Center, position, and fasten lower area of mouth with pins to
the body. Whip stitch the bottom of the mouth onto the body, then fill with stuffing.
Continue to whip stitch around the top of the mouth until completely attached to body.
Optionally a black line can be embroidered through the red mouth.
Embroider on eyes, with black embroidery thread, just above the mouth OR
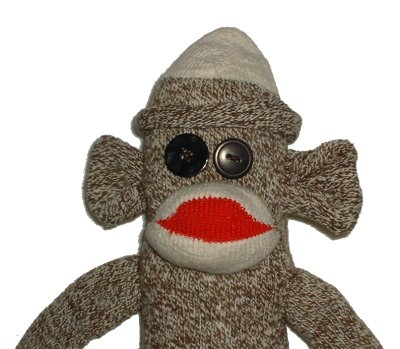
glue on 1/2" diameter googly eyes. (pictured monkey has googly eyes)
Tie a piece of red yarn or ribbon just below the mouth to form a neck (optional - not done on
pictured monkey).
For the arms, fold the rectangles in half the long way, with right sides together.
From the brown ends stitch a 1/4" seams down the long sides of the rectangle,
curving the seam at the bottom to form rounded hands. Turn right side out, then
fill firmly with stuffing (see picture for attaching tail, the arm pieces are just wider
and shorter). The arms should be positioned just under the neck. Turn your monkey
to the sides and center the arms. Turn under 1/4" around the opening and whip stitch
arms to monkey body.
For the ears, with right sides together, sew a 1/4" seam around rounded sides of ears.
Turn right side out, then fill lightly with stuffing. Turn under 1/4" at opening.
Top stitch 1/4" inch in from rounded sides (see picture). The ears should be positioned
with the top half of the ear in the white area of the head, and with the bottom half of the
ear in the brown area. Turn your monkey to the sides and center the ears. Whip stitch
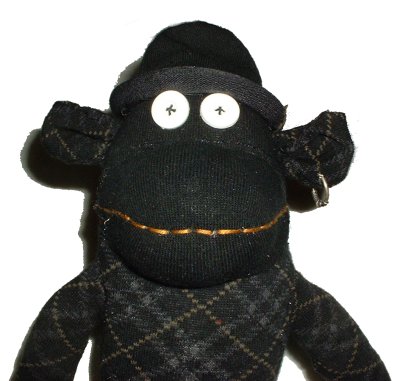
ears to monkey body. (pictured monkey does not have ears.)
For the hat, roll brown area up to form brim. Lightly fill with stuffing.
Position hat on top of head, then whip stitch inside edge of brim to monkey body.